Tổng quan
Lỗi “Access Denied” là một vấn đề phổ biến khi làm việc với Google API, đặc biệt là Google Drive API và Google Sheets API. Bài viết này sẽ hướng dẫn bạn cách khắc phục lỗi này một cách chi tiết và hiệu quả.
Video hướng dẫn
Xem video hướng dẫn chi tiết để hiểu rõ cách thực hiện từng bước.
Nguyên nhân gây lỗi Access Denied
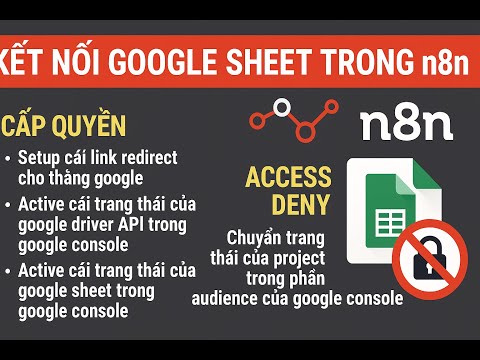
1. Cấu hình OAuth Consent Screen không đúng
- Audience không được thiết lập đúng
- Redirect URI không khớp
- Scopes không được cấp quyền đúng cách
2. API Services chưa được kích hoạt
- Google Drive API chưa được bật
- Google Sheets API chưa được kích hoạt
- Quota và billing chưa được cấu hình
3. Credentials không phù hợp
- OAuth 2.0 Client ID không đúng
- Service Account key thiếu quyền
- Domain verification chưa hoàn tất
Các bước khắc phục chi tiết
Bước 1: Thiết lập Link Redirect trong Google Console
1.1 Truy cập Google Cloud Console
- Đi đến Google Cloud Console
- Chọn project của bạn hoặc tạo project mới
- Điều hướng đến APIs & Services > Credentials
1.2 Cấu hình OAuth 2.0 Client ID
{
  "web": {
    "client_id": "your-client-id.apps.googleusercontent.com",
    "client_secret": "your-client-secret",
    "redirect_uris": [
      "http://localhost:3000/auth/callback",
      "https://yourdomain.com/auth/callback",
      "https://yourdomain.com/oauth2callback"
    ],
    "javascript_origins": [
      "http://localhost:3000",
      "https://yourdomain.com"
    ]
  }
}
1.3 Các loại Redirect URI phổ biến
- Local Development:
http://localhost:3000/auth/callback - Production:
https://yourdomain.com/auth/callback - OAuth Playground:
https://developers.google.com/oauthplayground - Custom:
https://yourdomain.com/oauth2callback
Bước 2: Bật Google Drive API và Google Sheets API
2.1 Kích hoạt APIs
- Đi đến APIs & Services > Library
- Tìm kiếm “Google Drive API”
- Click Enable
- Lặp lại với “Google Sheets API”
2.2 Cấu hình Quotas và Billing
# Kiểm tra quota hiện tại
gcloud services list --enabled --filter="name:drive.googleapis.com"
gcloud services list --enabled --filter="name:sheets.googleapis.com"
2.3 Cấu hình OAuth Scopes
const SCOPES = [
  'https://www.googleapis.com/auth/drive',
  'https://www.googleapis.com/auth/drive.file',
  'https://www.googleapis.com/auth/spreadsheets',
  'https://www.googleapis.com/auth/spreadsheets.readonly'
];
Bước 3: Xử lý lỗi Access Denied - OAuth Consent Screen
3.1 Cấu hình OAuth Consent Screen
-
Đi đến OAuth Consent Screen
- APIs & Services > OAuth consent screen
- Chọn External (cho public apps) hoặc Internal (cho G Suite)
-
Thiết lập App Information
App name: Your App Name
User support email: [email protected]
App logo: Upload your logo (optional)
App domain: yourdomain.com
Developer contact: [email protected]- Cấu hình Scopes
Scopes:
  - https://www.googleapis.com/auth/drive
  - https://www.googleapis.com/auth/drive.file
  - https://www.googleapis.com/auth/spreadsheets
  - https://www.googleapis.com/auth/spreadsheets.readonly
3.2 Cấu hình Test Users (Development)
-
Thêm Test Users
- Scroll xuống phần “Test users”
- Click “Add Users”
- Thêm email của bạn và các user cần test
-
Publishing Status
Status: Testing
  - App is in testing mode
  - Only test users can access
  - Up to 100 test users allowed

Status: In production
  - App is live and available to all users
  - Requires verification for sensitive scopes
3.3 Cấu hình Domain Verification
-
Verify Domain
- OAuth consent screen > Domain verification
- Thêm domain của bạn
- Thực hiện verification theo hướng dẫn
-
App Verification (nếu cần)
- Cần thiết cho production apps
- Yêu cầu privacy policy và terms of service
- Quá trình verification có thể mất 1-2 tuần
Code Examples
Node.js với Google APIs
const { google } = require('googleapis');
const fs = require('fs');

// Cấu hình OAuth2
const oauth2Client = new google.auth.OAuth2(
  'your-client-id',
  'your-client-secret',
  'http://localhost:3000/auth/callback'
);

// Thiết lập credentials
oauth2Client.setCredentials({
  access_token: 'your-access-token',
  refresh_token: 'your-refresh-token'
});

// Sử dụng Google Drive API
const drive = google.drive({ version: 'v3', auth: oauth2Client });

// Sử dụng Google Sheets API
const sheets = google.sheets({ version: 'v4', auth: oauth2Client });
Python với Google APIs
from google.oauth2.credentials import Credentials
from google_auth_oauthlib.flow import InstalledAppFlow
from googleapiclient.discovery import build

# Cấu hình scopes
SCOPES = [
    'https://www.googleapis.com/auth/drive',
    'https://www.googleapis.com/auth/spreadsheets'
]

# OAuth flow
flow = InstalledAppFlow.from_client_secrets_file(
    'credentials.json', SCOPES)
creds = flow.run_local_server(port=0)

# Sử dụng APIs
drive_service = build('drive', 'v3', credentials=creds)
sheets_service = build('sheets', 'v4', credentials=creds)
Troubleshooting nâng cao
Lỗi “redirect_uri_mismatch”
// Kiểm tra redirect URI trong code
const redirectUri = 'http://localhost:3000/auth/callback';

// Đảm bảo URI khớp với Google Console
const authUrl = oauth2Client.generateAuthUrl({
  access_type: 'offline',
  scope: SCOPES,
  redirect_uri: redirectUri
});
Lỗi “access_denied” trong OAuth flow
// Kiểm tra scopes
const SCOPES = [
  'https://www.googleapis.com/auth/drive',
  'https://www.googleapis.com/auth/spreadsheets'
];

// Đảm bảo scopes được cấp quyền trong OAuth consent screen
const authUrl = oauth2Client.generateAuthUrl({
  access_type: 'offline',
  scope: SCOPES,
  prompt: 'consent' // Force consent screen
});
Lỗi “insufficient_scope”
// Kiểm tra quyền cần thiết
const requiredScopes = [
  'https://www.googleapis.com/auth/drive.file',
  'https://www.googleapis.com/auth/spreadsheets'
];

// Verify scopes trong token
const tokenInfo = await oauth2Client.getTokenInfo(accessToken);
console.log('Granted scopes:', tokenInfo.scopes);
Best Practices
1. Security
// Sử dụng environment variables
const config = {
  clientId: process.env.GOOGLE_CLIENT_ID,
  clientSecret: process.env.GOOGLE_CLIENT_SECRET,
  redirectUri: process.env.GOOGLE_REDIRECT_URI
};

// Secure token storage
const secureStorage = {
  accessToken: encrypt(accessToken),
  refreshToken: encrypt(refreshToken)
};
2. Error Handling
try {
  const response = await drive.files.list({
    pageSize: 10,
    fields: 'nextPageToken, files(id, name)'
  });
} catch (error) {
  if (error.code === 403) {
    console.log('Access denied - check OAuth consent screen');
  } else if (error.code === 401) {
    console.log('Unauthorized - refresh token');
  }
}
3. Token Management
// Auto refresh token
oauth2Client.on('tokens', (tokens) => {
  if (tokens.refresh_token) {
    // Store refresh token
    storeRefreshToken(tokens.refresh_token);
  }
  // Store access token
  storeAccessToken(tokens.access_token);
});
Monitoring và Debugging
1. Log Analysis
// Enable detailed logging
const { google } = require('googleapis');
google.options({ auth: oauth2Client });

// Log API calls
const drive = google.drive({ version: 'v3', auth: oauth2Client });
drive.files.list({}, (err, res) => {
  if (err) {
    console.error('API Error:', err);
  } else {
    console.log('Success:', res.data);
  }
});
2. API Quota Monitoring
// Check quota usage
const quotaResponse = await drive.about.get({
  fields: 'user,storageQuota'
});
console.log('Quota info:', quotaResponse.data);
Kết luận
Việc fix lỗi “Access Denied” trong Google API chủ yếu liên quan đến cấu hình OAuth Consent Screen và thiết lập redirect URIs. Với các bước hướng dẫn trên, bạn có thể khắc phục lỗi này một cách hiệu quả và đảm bảo ứng dụng hoạt động ổn định.
Checklist nhanh
- Redirect URIs được cấu hình đúng
- Google Drive API và Sheets API đã được kích hoạt
- OAuth Consent Screen được thiết lập đúng
- Scopes được cấp quyền phù hợp
- Test users được thêm vào (cho development)
- Domain verification hoàn tất (cho production)
Tài nguyên bổ sung
- Google OAuth 2.0 Documentation
- Google Drive API Reference
- Google Sheets API Reference
- OAuth Consent Screen Guide
Hỗ trợ
Nếu bạn gặp khó khăn trong quá trình cấu hình hoặc cần tư vấn thêm, hãy để lại bình luận hoặc liên hệ qua các kênh hỗ trợ.